NEC NT-6A
Engineering excellence verging on overkill
NEC NT-6A
Engineering excellence verging on overkill
It is clear that the engineering team had free rein over the design of the NT-6A. And they went overboard, presumably with the intent to demonstrate NEC's ability to build a solid, finely crafted set.
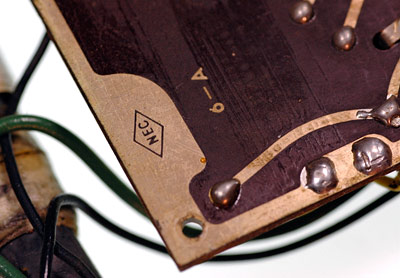
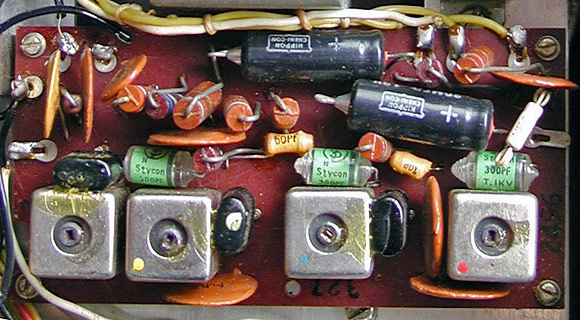
Let's start with a look at the print side of the circuit boards as a jump-off point.
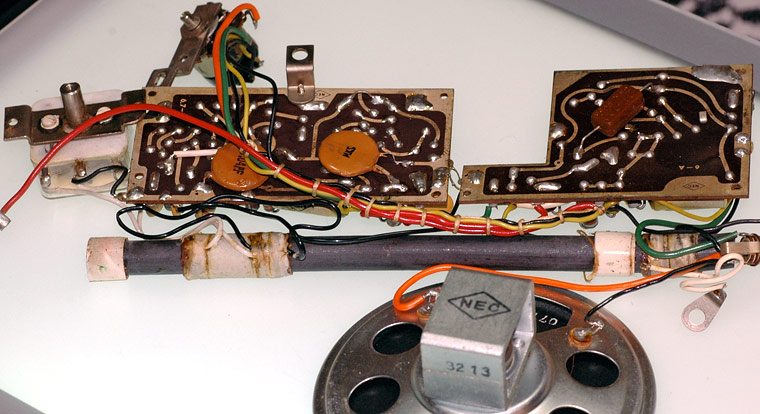
As you can see in the photo above, the IF and AF stages are mounted on separate printed circuit boards. (You should be able to spot the gap between the two boards, with nothing more than the legs of a couple of capacitors crossing the divide.) There is some logic in this design, however.
Note the "6.7-H" label on the backside of the IF stage circuit board. This same board was employed in both the NT-6A and NT-7H. That's, right down to sharing common screw holes, cut-outs and soldered leads, whether or not used by the specific model.
Here are the IF boards from the NT-6A (above) and the NT-7H (below).
The two pictured boards are not from the same production run. But I believe they get the point across. I imagine making this common assembly might have streamlined production and inventory management for the two models somewhat.
Of course, the three-trransistor board for the AF stage is specific to the NT-6A.
The top two photos on this page also show how the "Polyvaricon" (variable tuning capacitor) and volume switch for the NT-6A are not mounted on the circuit board(s). I intend to discuss this further as we proceed to examine an attention to details that must have made the NT-6A a remarkably time consuming and expensive model to build.
Let's take a look at the labor-intensive wiring from the circuit boards.

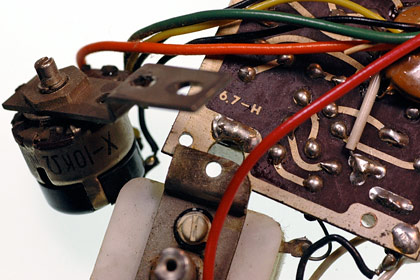
I can't count that high, but there are easily a couple of dozen screws used in assembling the NT-6A, along with several rugged metal mounting brackets and frames that are not commonly found in radios of this class. A few examples follow. First, take one more look at the photo showing the Polyvaricon and volume control switch.
The Polyvaricon and volume control switch are mounted to strong metal brackets, which are each in turn secured to the inside of the cabinet.
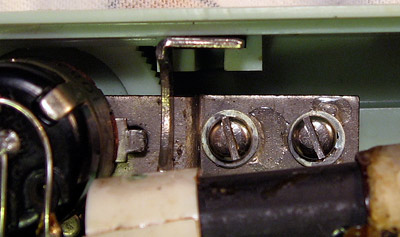
The photo above shows the two heavy screws that hold the volume control switch in place. The mounted Polyvaricon can be seen in the photo of the radio's interior at the top of the previous page.
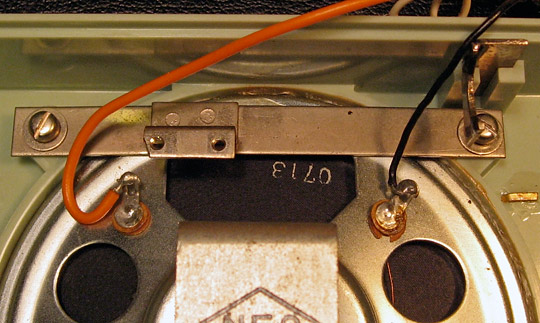
Here you see the rigid bracket that secures the top of the 3-1/2" speaker, while also creating a frame with two screw holes to which the printed circuit boards are secured. If you look closely, you should also be able to make out one of two the rigid metal brackets upon which the ferrite bar antenna rests. There are a couple more such brackets inside; but I'm sure you get the idea.
Before proceeding to the next page, let me show you the inside of the cabinet. While it may not seem remarkable, there are no fewer than 14 brass screw studs on the inside of the cabinet.
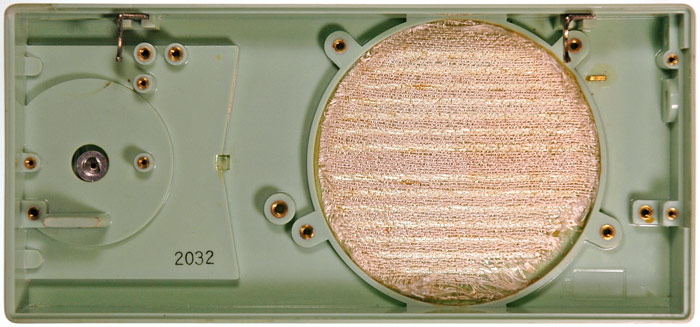
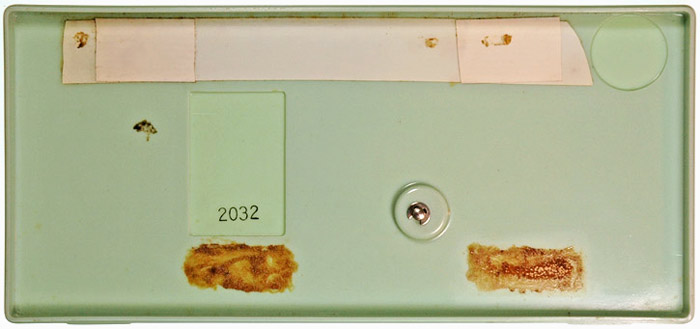
There's no product label on the inside of the NT-6A back cover. All you get is a piece of tape to pad the ferrite bar antenna, and the serial number of the unit stamped on the plastic. The serial number is also stamped on the inside of the cabinet, (as shown in the photo above.)
Summarizing, I believe that NEC went all out on this model to show retailers in Japan and potential distributors abroad just what they could do, rather than to sell large quantities. It's hard to believe that the NT-6A could have been a profit maker. And, within months the NT-6B was rolled out to succeed this sophisticated charmer. The NT-6B did make it to export and did prove itself a reasonably good seller. Of course, it also cut back on many of the engineering luxuries/excesses, so would have been a more viable product to market.